Wednesday, June 27, 2012

Glue Marker with Twine and Embellishments


Hello everyone!! Tarrah here with you today......another fabulous trend going around at the moment that I am sure you have all seen is the bakers twine and handmade embellishments!!! So I thought I would share with you today how super easy it is to attach that said twine and some handmade embellishments using the all new X-Press It Glue Marker pen!!!!   
When I first used the Glue Marker pen I was pleasantly surprised at just how much glue actually comes out of the pen so you don't need to use much at all!!!

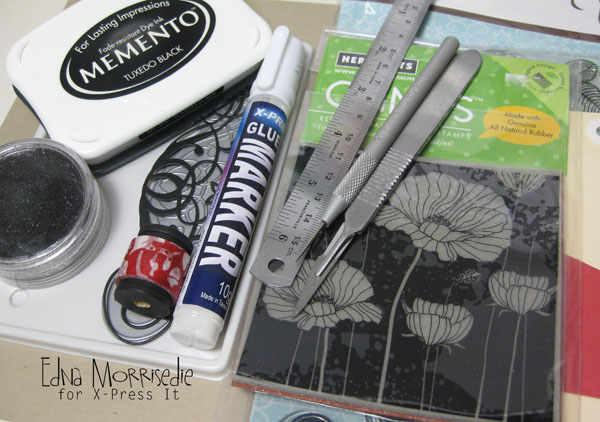
Start off by gathering some supplies you will be using......

Give the glue marker a good shake before using, press down and 'draw' your glue onto your embellishments...with these Kraft cardstock cogs and handmade embellishments I applied the glue to where the button was going to adhere to the cog and this then made it easy to move around my layout for placement before adhering the entire embellishment down. 

The great thing is about the glue marker is that there is absolutely NO excess glue running out everywhere because you have been able to use just a small amount that's why it is so fabulous for embellishments and small bits and pieces. 

Next I used the glue marker to adhere some twine to my layout and wow it did it with such ease. 

I first placed the twine in the direction and shape I wanted and then all I did was lift the twine slightly and placed the glue in some strategic spots....just enough to get the twine stuck down without losing the shape and look I wanted. 

Another top idea to use the glue marker for is if you have any embellishments or Thickers or stickers etc that may have lost there stick....the glue marker is perfect for these, you can just place a small amount of glue marker to the back of them!!!

Here is my finished layout with all the embellishments attached using the glue marker...

Thank you so much for stopping by the X-Press IT blog today, I hope I have inspired you to create something wonderful using the Glue Marker....whether it be a small project like a card or a big project like an off the page etc we would LOVE to see them, make sure you leave a comment and leave a link so we can pop on over and take a look at your work.

Stay tuned for next month.....we have lots more great ideas to show you all using the X-Press It products and there might even be a prize or two up for grabs as well!!!!!
Have a great day!!!
Tarrah :)    
Pin It

Wednesday, June 20, 2012

Glue Pen Sparkles and Scrappy Delights

This month we are featuring X-Press It's newest delight in the very versatile Glue Marker.  And a Marker it is, I love how it allows you to choose how you will layer the glue, either a thin veil for easy stick or a pool of glue for adding dimension.... you will see what I mean in the different applications of the Glue Marker in this tag tutorial....

I wanted to add glitter by way of scroll and flourish like embellishments and to add texture with some paper scraps, here is what I started with:


I die cut fine embellishments from black card and added very fine, sparkling black glitter to them, which was really easy thanks to the Glue Marker.  It is as simple as drawing the glue across the face of the die cut, you get a much denser application of glitter if you allow the Glue Marker to sit as you apply it to the card, which will result in a slight pool of glue for the glitter to adhere to...


After stamping a double series of each of the two flowers from this reverse image, I chose two pieces of each flower to pop up, the popped layers are achieved with a combination of tiny pieces of Foam Mounting Tape (at the top of the petals) and a fine application of the Glue Marker (at the base of the petals)... the Glue Marker was fabulous for this, instant flat bond!!!


To add dimension to the centre of each flower and to tie in with the red elements across the card, I took a piece of scrap card and made it into tiny pieces of confetti, pooling the ink on top of the centre detail in each of the stamped flowers and then piling the confetti atop the glue, wait a couple of seconds and shake off the excess and you will have added a little more dimension to these flowers.


Once the sparkle is added to the flourishes and the flowers have been built it was a simple case of putting the tag together... I used the Glue Maker to attached the paper to the tag base, and to add each of the embellishments, it is super fabby on the fine details of the flourishes, a quick dab in a few strategic places and the glittering delights are all in place.


I  hope you enjoyed this tutorial for the Glue Marker, it is a must for your tool kit, and has fast become my crafty friend!!  Here is a detail shot of the glitter, flower dimension and confetti...


...until next time, enjoy!!


Pin It

Wednesday, June 13, 2012

Introducing the NEW X-Press It Glue Marker

Have you noticed the new confetti craze in scrapbooking lately?  If you are a fan of Pinterest you will see it everywhere! I love the look but always found it hard to adhere the smaller pieces to my projects- until now!
X- Press It's new Glue Marker is the perfect size to adhere these itty bitty pieces. I created a card to show how easy it is!
Step 1 Gather your supplies including pattern paper, embellishments, hole punches and the X- Press It Glue Marker.

Step 2 Using your various sized hole punches punch some circles from cardstock and pattern paper.
Go a head and create your card from co ordinating card and pattern paper.

Step 3 Scatter the punched circles on your card and when you are happy with your card use the X- Press It Glue Marker to glue them to the card base. Its very easy to use and drys quickly and firmly!

and my finished card!

I hope to see some confetti filled projects uploaded to our facebook page soon.
Kim
Pin It