

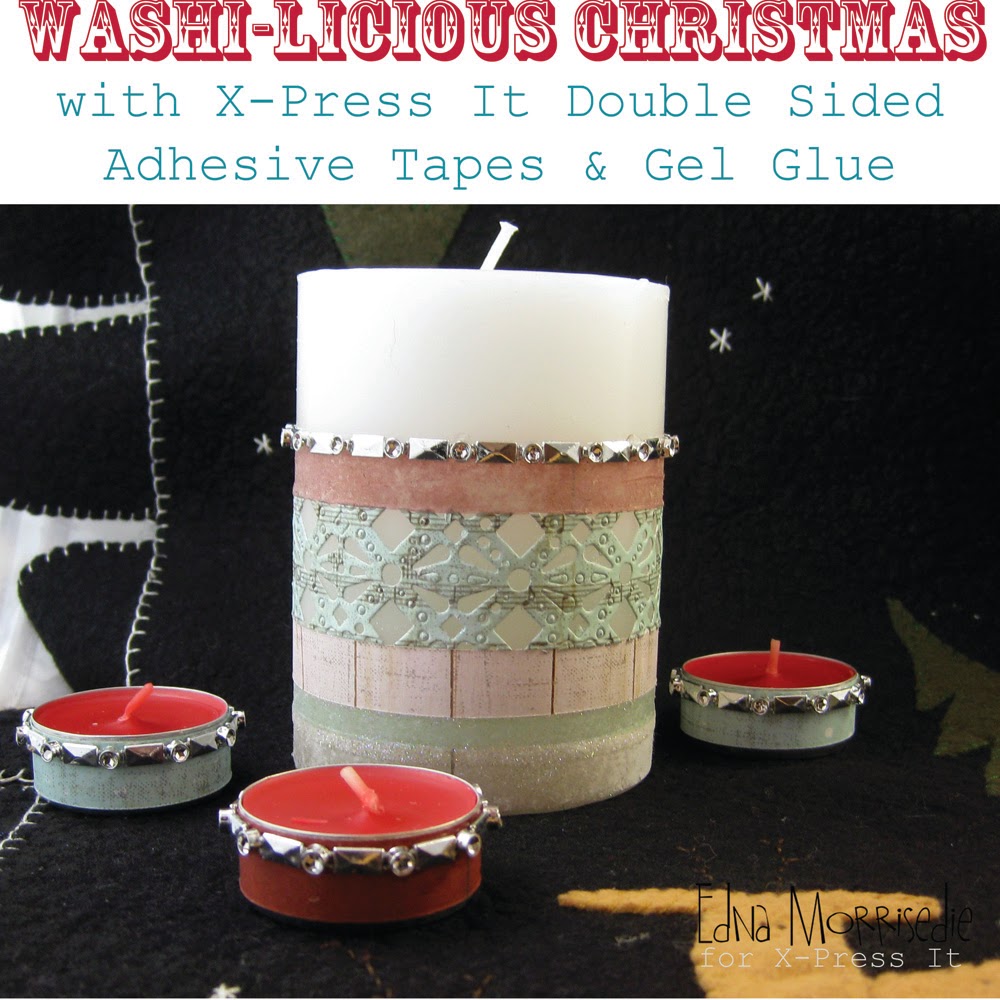
I wanted to make one feature candle to sit in the middle of a table runner, and then to have different, but co-ordinated, tea-light candles to add to the mix. With the feature candle I have used two different types of faux washi tape. The first applies the tape directly to the paper, in multiple strips and then you splice away the strips of faux washi tape.

With one of the strips I have used a cutting die plate to give extra form to the design, the double sided adhesive cuts like butter in any die cutting machine and rarely leaves any residue behind. This works the same with X-Press It Double Sided Adhesive Sheets too, I just used a double strip of adhesive tape today, the choice is yours.

The second technique sees strips of paper firmly pressed into strips of 12mm Double Sided Adhesive. Once the paper is adhered, good side down, spritz or brush with water and rub away the backing paper to reveal the very fine upper layer of the paper. This is like the paper transfer technique used with X-Press It TripleTac, but achieved with Double Sided Adhesive. You need to be gentle with the rubbing, but the work is worth it to have a different texture of faux washi tape, with a transparent effect as your end result.

For the tea light candles, the idea was to cover up the silver exterior of the candles with faux washi tape, co-ordinating the look with the feature candle. This is simply achieved by using the tape to paper technique from above, I used 12mm double sided adhesive tape for these and it works a dream.
I have added faux metal embellishment to the tea lights and around the top of the papers on the candle to bring them together. I adhered these elements with X-Press it Clear Gel Glue
Once the strips of faux washi tape were ready I layered them up the base of the candle, leaving room to run 3mm double sided adhesive around the base of the candle, you can see it in place in this picture. All I did to apply the glitter is simply remove the backing and rub some fine glitter into the adhered space to add yet another texture to your festive candle.

This is a quick and easy way to bring to add some festivity to your tables and general decorations this Christmas, or all year round with any types of paper and decorations that you prefer. Double Sided Tape is my most used X-Press It product, its uses are endless, here is what I used in my project today:
X-Press It 3mm Double Sided Adhesive
X-Press It 6mm Double Sided Adhesive
X-Press It 12mm Double Sided Adhesive
FabScraps Papers
X-Press It Clear Gel Glue
And here are my candles out on my very precious felted table runner:
There is still plenty of inspiration to come from the X-Press It Blog this year, however, this is my last tutorial for this year, so may I say thanks for tuning in and all the best for the season... however you may celebrate it! I look forward to seeing you all in 2014.... EDNA.Pin It
They look awesome Edna.
ReplyDelete